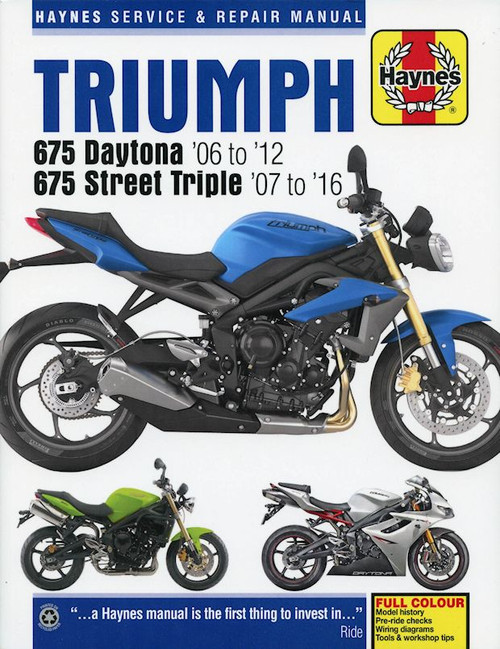
The Haynes 4876 - Triumph 675 Datona / Street Triple Repair Manual covers the following specific models:
- Triumph Daytona 675, (674.8cc) 2006-2012
- Triumph Daytona R 675, (674.8cc) 2011-2012
- Triumph Street Triple, (674.8cc) 2007-2016
- Triumph Street Triple R, (674.8cc) 2009-2016
- Triumph Street Triple RX, (674.8cc) 2015-2016
Note: Manual includes Special Edition models.
This Triumph Datana / Street Triple repair manual provides DIY motorcycle repair and service procedures in stepwise form. It includes color wiring diagrams and detailed coverage for all motorcycle systems such as brakes, clutch, transmission, engine, suspension, frame and much, much more. The procedural instruction also includes exploded view photos and diagrams to enhance your confidence in the repair and service tasks for your Triumph.
Book Excerpt: 2006-2016 Triumph 675 Daytona, Street Triple, Street Triple R / RX Repair Manual ENGINE, CLUTCH AND TRANSMISSION
CRANKSHAFT AND MAIN BEARINGS REMOVAL
- Remove the engine from the frame (see Section 4) and separate the crankcase halves (see Section 21).
- Refer to Section 24 and separate the connecting rods from the crankshaft (unless the pistons have been removed, in which case the rods can remain attached for now, and removed later if required). NOTE: If no work is to be carried out on the piston/connecting rod assemblies there is no need to remove them from the bores (unless the liners have been removed), but, making sure the liners are secure (see Section 14), you can push them up to the top of the bores so that the big-ends are clear of the crankshaft.
- Before removing the crankshaft, check the amount of end-float using a dial gauge. If it exceeds the limit specified, the crankshaft and/or the crankcases must be replaced with new ones.
- Align and then remove the balancer shaft (see Section 26). Lift the crankshaft out of the upper crankcase half, taking care not to dislodge the main bearing shells (see illustration).
- If required, remove the bearing shells from the crankcase halves by pushing their centers to the side, and then lifting them out (see illustration). Keep the shells in order. INSPECTION
- Clean the crankshaft with solvent, squirting it through all oil passages. If available, blow it through and dry with compressed air. Check the balancer shaft drive gear teeth and the cam chain drive sprocket teeth for wear and damage, referring to Sections 26 and 10 to also check the driven gear and sprockets and the cam chain.
- Refer to Section 23 and examine the main bearing shells. If they are scored, badly scuffed or appear to have been seized, new shells must be installed. Always renew the main bearings as a set. If they are badly damaged, check the corresponding crankshaft journals. Evidence of extreme heat, such as discoloration, indicates that lubrication failure has occurred. Be sure to thoroughly check the oil pump and pressure relief valve as well as all oil holes and passages before reassembling the engine.
BRAKES, WHEELS AND FINAL DRIVE
REAR SPROCKET COUPLING/RUBBER DAMPER
- Remove the rear wheel (see Section 14). Lift the sprocket coupling out of the wheel, noting how it fits, and remove the spacer inside it (see illustrations 15.24a and b).
- Check the coupling for cracks or any obvious signs of damage.
- Lift the rubber damper piece from the wheel hub, noting how it fits. Check it for cracks, hardening and general deterioration (see illustration). Replace the damper piece with a new one if necessary.
- Checking and replacement procedures for the sprocket coupling bearing are described in Section 15.
- Installation is the reverse of removal. Make sure the damper assembly is correctly fitted.
Subject: 2006, 2007, 2008, 2009, 2010, 2011, 2012,2013, 2014, 2015, 2016 Triumph 675 Daytona, Street Triple, Street Triple R and RX service, maintenance, and repair instructions. ISBN-10: 0857339249 | ISBN-13: 9780857339249 | Haynes 4876
- About this manual
- Safety first!
- Identification numbers
- Buying spare parts
- Coolant level
- Engine oil level
- Legal and safety checks
- Brake fluid levels
- Tires
- Suspension, steering and drive chain
- Model development
- Bike specs
- Specifications
- Lubricants and fluids
- Maintenance schedule
- Component locations
- Maintenance procedures
- Engine, clutch and transmission
- Cooling system
- Engine management system
- Frame and suspension
- Brakes, wheels and final drive
- Fairing and bodywork
- Tools and workshop tips
- Security
- Lubricants and fluids
- Conversion factors
- Storage
- Troubleshooting


