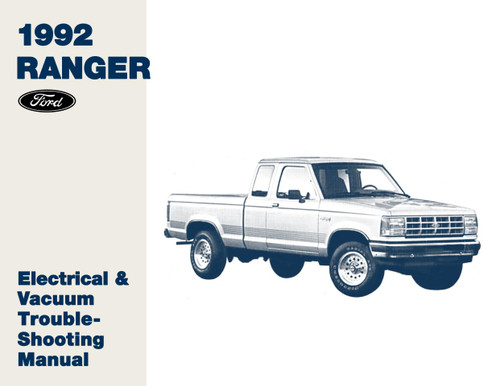
This repair and service manual by Haynes, covers Ford Ranger pick-up trucks and Ford Bronco II, 2WD and 4WD with gasoline engine, 1983 to 1992.
Note: manual DOES NOT include diesel engine info.
Do-it-yourself mechanics depend on Haynes manuals for maintenance and repair work information on their vehicles, and with good reason.
Haynes manuals are jam-packed with text instructions and photos of the assemblies or systems being worked on, which makes them a breeze to use. This translates into time and money savings for you. And best of all, The Motor Bookstore offers all Haynes manuals at sale prices.
Book Excerpt: 1983-1992 Ford Ranger, Bronco II Repair Manual 3.0L V6 ENGINE
OIL PAN-REMOVAL AND INSTALLATION REMOVAL
- Disconnect the negative cable from the battery.
- Remove the oil dipstick.
- Unbolt the fan shroud and lay it over the fan (see Chapter 3).
- Remove the distributor (see Chapter 5).
- Detach the motor mounts from the frame.
- Raise the vehicle and support it securely on jackstands. Drain the oil and replace the oil filter (see Chapter 1).
- Remove the retainer clip from the oil pan sensor and unplug the electrical connector from the sensor.
- Remove the starter motor (see Chapter 5).
- Remove the inspection cover from the front of the transmission.
- On 2WD models, remove the passenger's side axle beam (see Chapter 10). Caution: Be sure to remove the brake caliper and tie it up out of the way.
- Unbolt the oil pan.
- Use a hoist to raise the engine approximately two inches.
- Detach the oil pan from the engine. If the pan is difficult to break loose, tap on it with a rubber mallet. CAUTION: The oil pan is a tight fit between the transmission spacer plate and the oil pump pickup tube. Be careful not to damage the pickup tube when you remove the pan.
INSTALLATION- Remove all traces of old gasket material from the mating surfaces and clean the oil pan with solvent. Clean the block and pan mating surfaces with acetone or lacquer thinner to remove any traces of oil.
- Install a new gasket on the oil pan, using contact adhesive.
- Apply a 1/4 inch bead of RTV sealant to the junctions of the block and rear main bearing cap and also the junction points of the timing chain cover and block, for a total of four places. NOTE: Follow the gasket manufacturer's instructions. Don't allow the sealant to dry before installing the pan.
- Position the oil pan on the engine block and install the bolts, tightening them to the torque listed in this Chapter's Specifications.
- Reinstall the remaining parts in the reverse order of removal.
- Add coolant and oil. Run the engine and check for oil and coolant leaks.
SUSPENSION AND STEERING SYSTEMS
TIE-ROD ENDS-REMOVAL AND INSTALLATION REMOVAL
- Loosen the front wheel lug nuts on the side to be disassembled. Raise the front of the vehicle, support it securely on jackstands, block the rear wheels and set the parking brake. Remove the front wheel.
- Remove the cotter pin and loosen the nut on the tie-rod end stud. Discard the cotter pin.
- Loosen the clamp bolts on the tie-rod adjusting sleeve.
- Unscrew the adjusting sleeve. Count and record the number of turns it takes to back the sleeve off the tie-rod end.
- Disconnect the tie-rod from the spindle arm with a tie-rod remover, a two-jaw puller or a pickle fork removal tool. NOTE: On 4WD models the tie-rod end is inserted in from the top of the spindle. On 2WD models the tie-rod is inserted from the bottom of the spindle. Remove the nut and detach the tie-rod end from the spindle arm.
INSTALLATION- Install the tie-rod onto the spindle arm. Make sure the front wheels and steering wheel are in the straight ahead position. Make sure the tie-rod stud is seated in the taper to prevent it from rotating while tightening the nut.
- Install a new nut on the stud and tighten it to the torque listed in this Chapter's Specifications. Install a new cotter pin and bend the ends over completely.
- Install the adjusting sleeve onto the tie-rod end the same number of turns noted during removal in Step 4.
- Tighten the clamp bolts on the tie-rod adjusting sleeve to the torque listed in this Chapter's Specifications. Make sure the tie-rod is positioned correctly in the same position as when it was removed.
Subject: 1983, 1984, 1985, 1986, 1987, 1988, 1989,1990, 1991, 1992 Ford Ranger, Bronco II service, maintenance, and repair procedures. ISBN-10: 1563920662 | ISBN-13: 9781563920660 | Haynes 36070
- Introduction: Vehicle identification numbers; Buying parts; Maintenance techniques, and more.
- Tune-up and routine maintenance
- Engine and overhaul procedures
- Cooling, heating and air-conditioning systems
- Fuel and exhaust systems
- Engine electrical systems
- Emissions control systems
- Transmission
- Brakes
- Suspension and steering systems
- Body
- Chassis electrical system
- Wiring diagrams


Above: Nicholas Kirsch, from Kennewick, Washington, a Landscape Architecture student at the University of Idaho, installed a 4" Rough Country Suspensions lift kit on his 1989 Ford Ranger Custom, single cab short box pickup truck.